
Roll a cross joint - HIGHKEA manual

Rolling a cross-joint - A hIghKEA construction manual
If you feel like taking your joint rolling skills to the next level, you will no longer be satisfied with normal spliff or "inside-outs". Luckily, the world of the different joint variations seems to be endless! Today we want to show you how to build a cross-shaped doobie. So that you can show off with your friends at the next chill session.
What you need for a cross-joint:

- Your weed
- A pair of (pointed) scissors
- A Grinder
- Three lighters
- If you do not want to roll pure: a herbal blend or tobacco of your choice

- Preferably an endless roll, but several long papers also do the job
- A (rather thick) filter of your choice (paper tip, activated carbon filter, ...)

- A friend (later we will explain why...)
- A few minutes & a little finesse
Let's roll a special spliff!

First of all we prepare a longer and a slightly shorter paper. For a cross you build two joints, which you then combine!

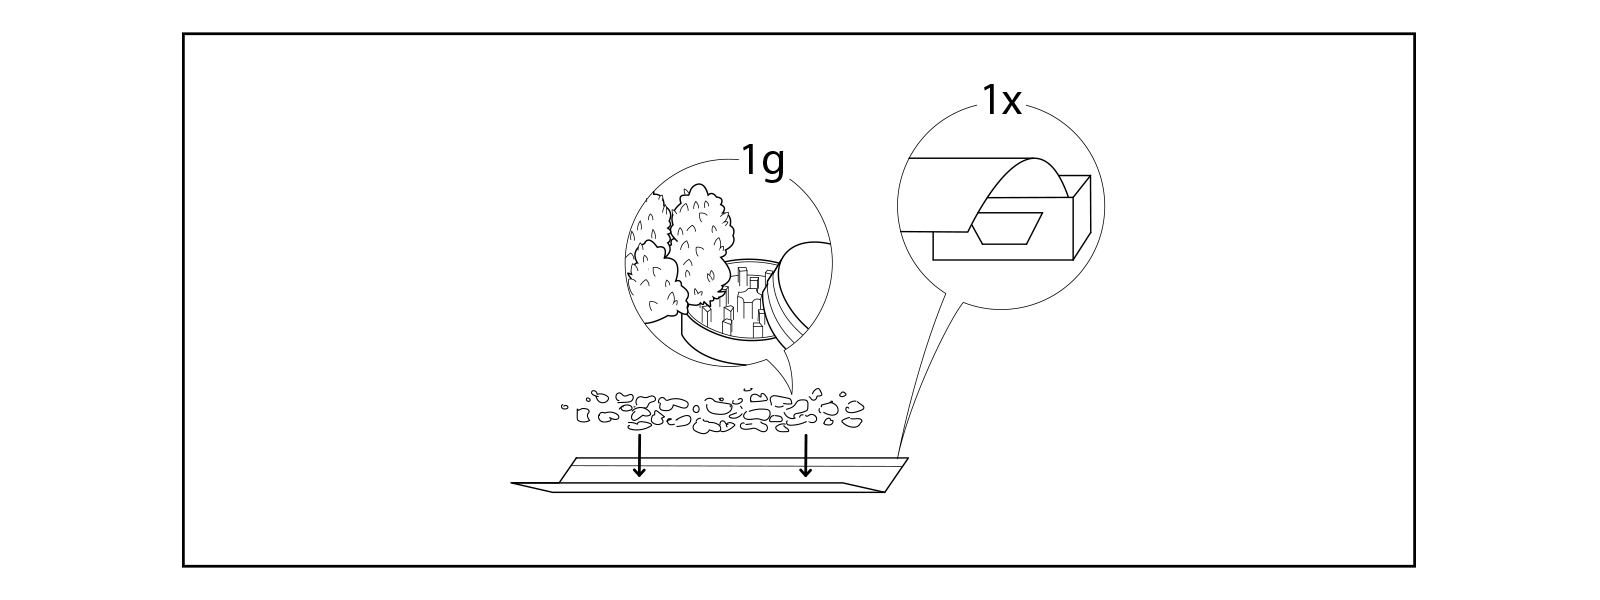
Then we prepare our Weed. For this you either crush it with a grinder, or you can simply grind it with your fingers or cut it up with scissors.

Let's start with joint number 1. Take the longer paper, which will form the long part of your cross, and your filter. Out of this we roll a (thick) cone - the diameter at the top should be about 1cm!
The shape should be a little conical: a bit thinner at the bottom, getting thicker towards the top.
After rolling, we stuff the spliff (not too loose, not too tight) and close the paper at the top so that no herbs can fall out.
Now we take care of joint number 2. For this we use the slightly shorter paper - you don't need a filter!
The second doobie should be thinner than the first. We also make sure that it is not tapered, but has the same diameter everywhere.
In other words, we want a thin joint without filter, the only filling material: herbs. We'll stuff it from above and below! We also twist the paper at both ends so that nothing crumbles out.
The next step: Let the stoner-origami begin!
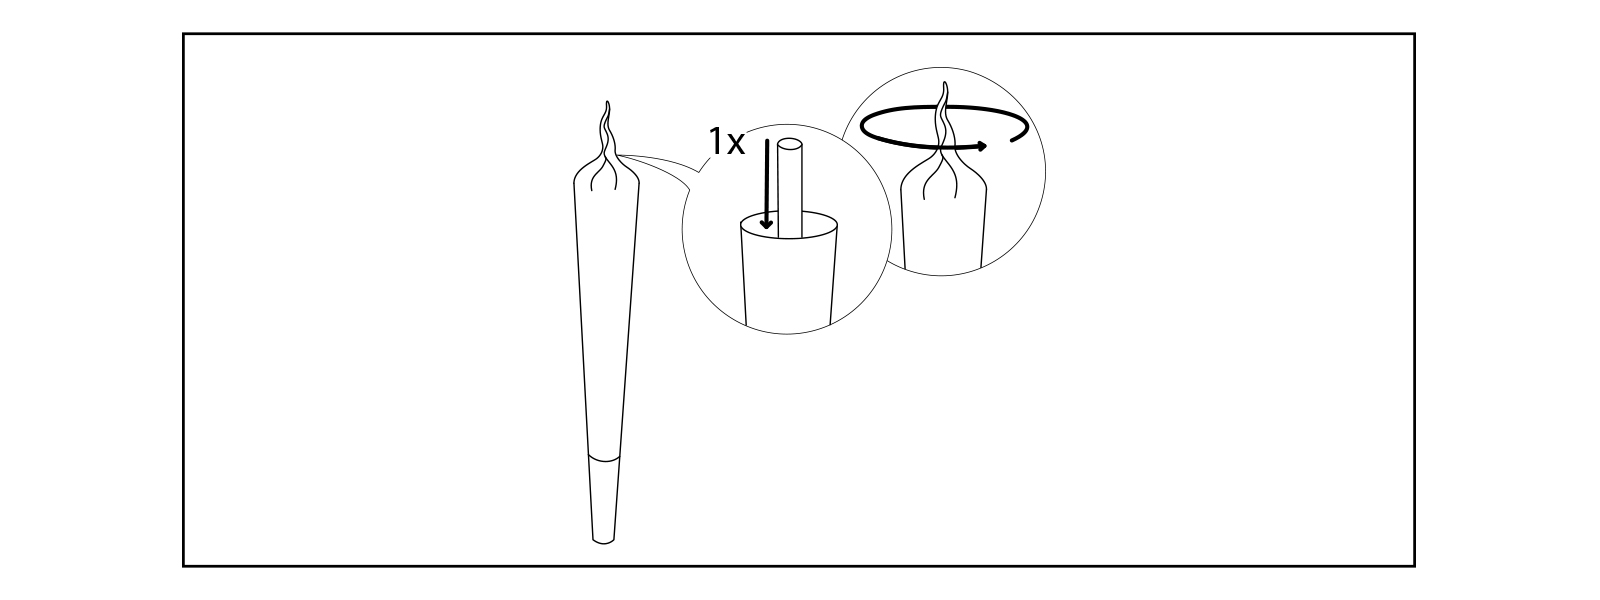
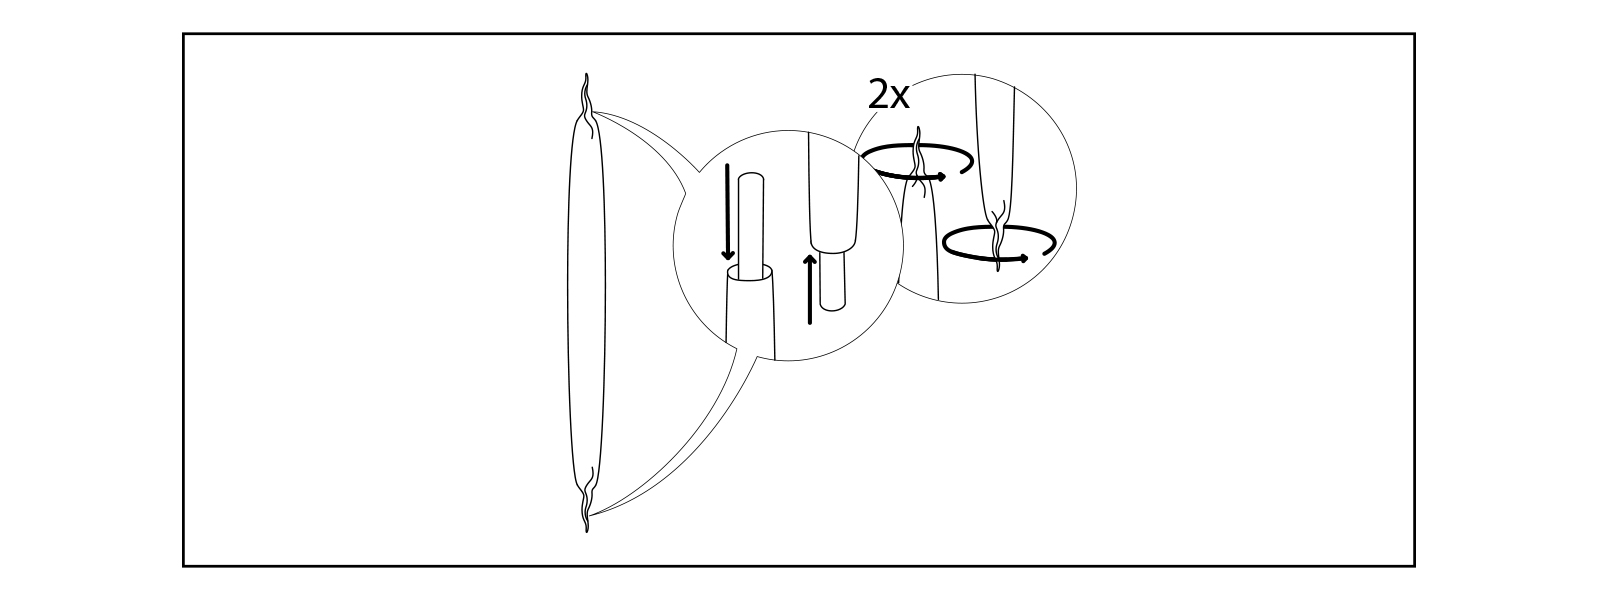
First, we pierce our thick cone - poke a hole in the big joint with the scissorcs! You should place it in the upper third, where the cross-bar of the cross is supposed to go afterwards. If you want to do it exactly, make sure that the part above the hole is half as long as the thin joint. Gently widen the hole until the smaller joint fits through.

Now we also carefully punch a hole in joint number two, the thinner one. To do this, use scissors or another sharp object to poke through the paper until you come out the other side. Be careful not to work too roughly and not to break your spliff. The hole should be placed exactly in the middle and be rather small. It will provide the air flow later!

Now we insert the small joint through the hole in the big one until it is right in the middle.
Make sure that the holes in the small joint are aligned so that they allow air to pass through inside the cross. They should therefore point towards the joint tip and mouthpiece.
Can we tape this?
Yeah, that's the plan. We should now have the "shell" of our joint in front of us: the cross is already there! Now it's time to glue it to seal the holes and give the cross joint stability.
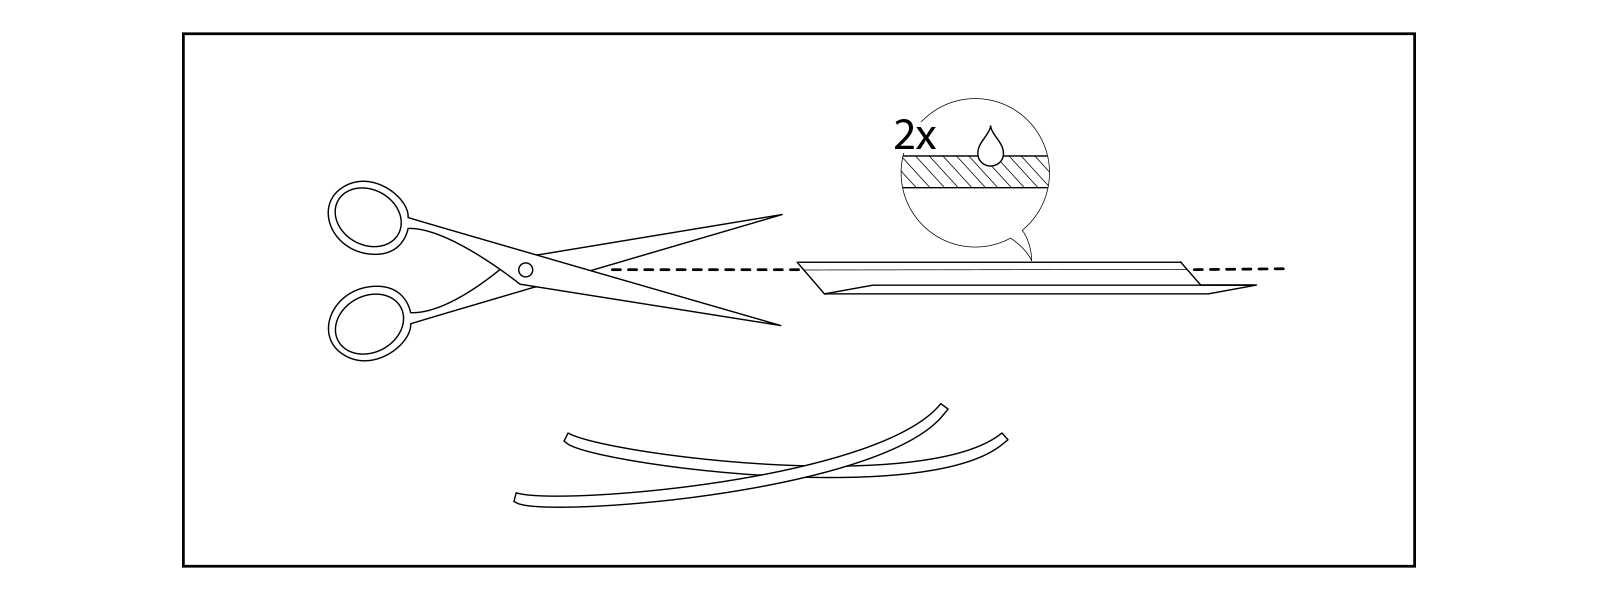
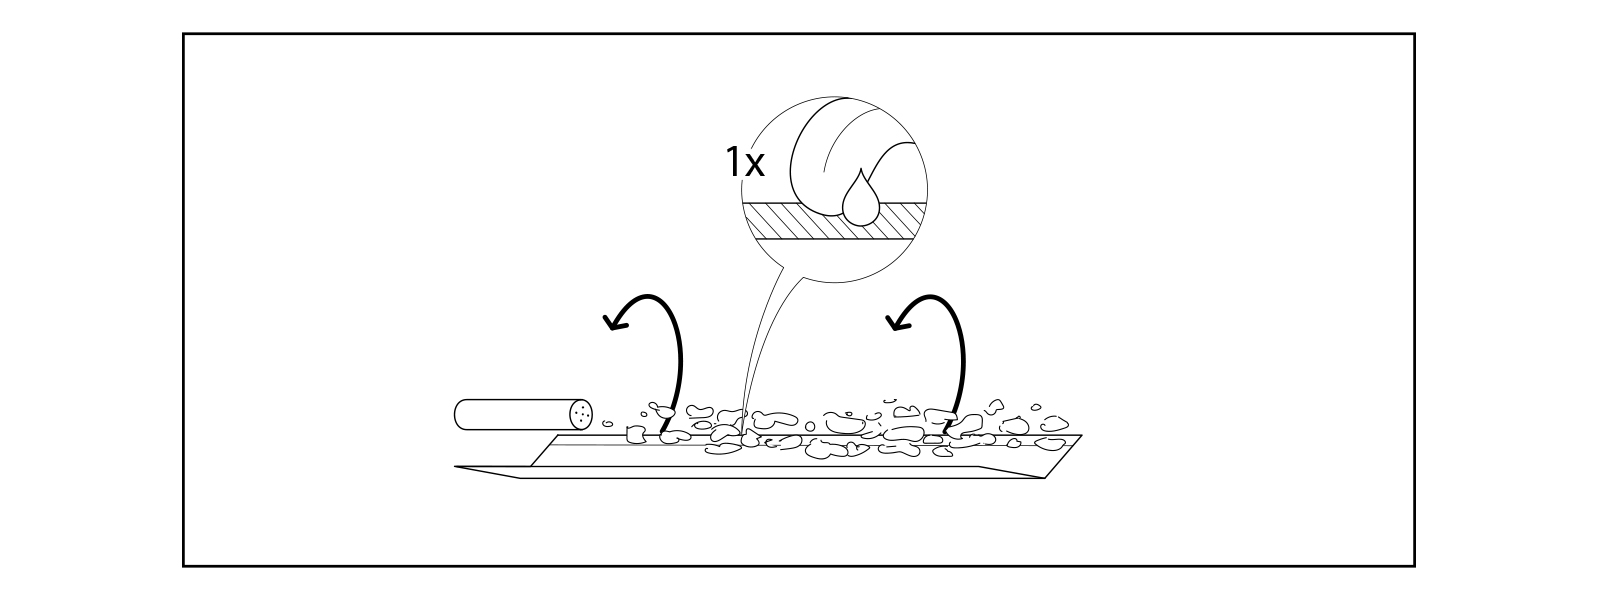
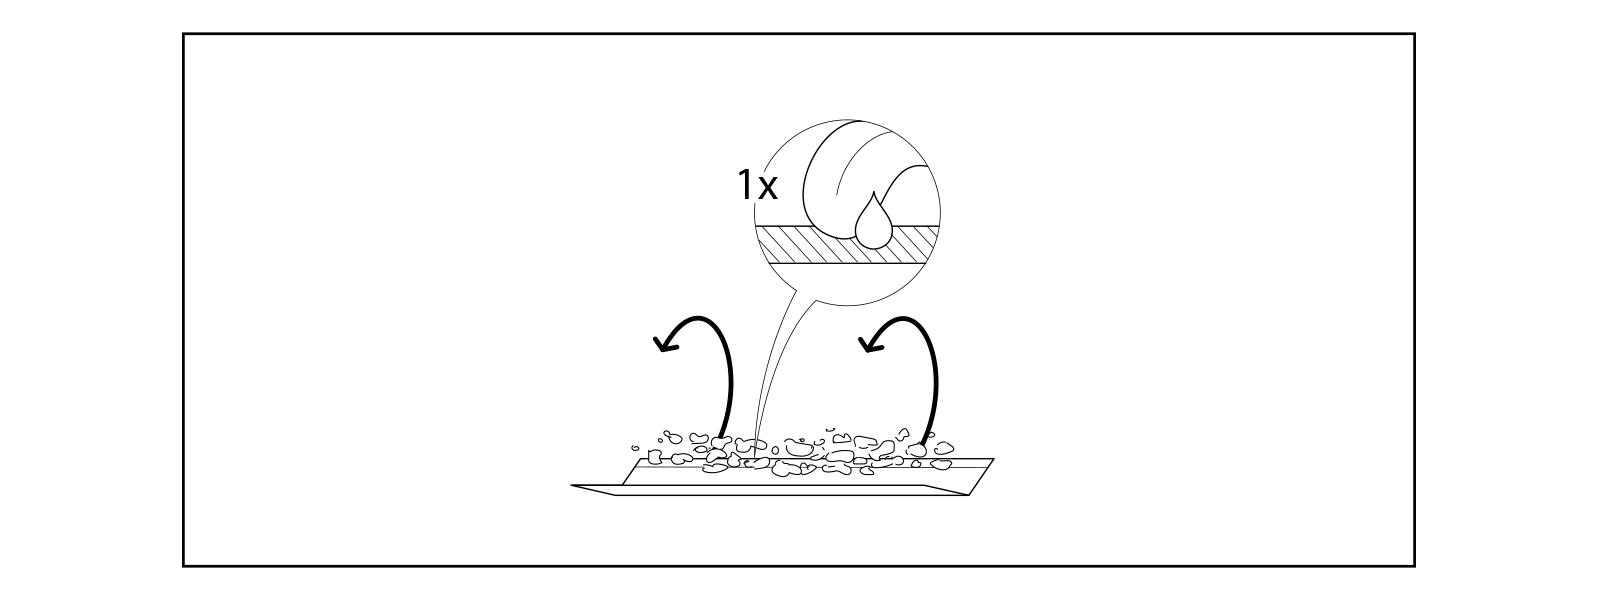
Therefore we take our scissors and cut two (or more) adhesive strips from our papers.

With this we then glue the interface of the two joints so that everything is sealed. Make sure that you don't use too much tape, but stick it efficiently so that it stays tasty when you smoke it afterwards.
Get lit! Light up the cross.
Now we will tell you what you need a friend for: To light it up!

Because our cross has 3 ends, it is very helpful to get some support. In order for our spectacular joint construction to burn down evenly, all three ends should be lit at the same time!

And of course it's always better to share such an extraordinary (and huge) spliff.
